

Create Magic with Light! Your Guide to a Mind-Blowing Camera Obscura
Travel to the origins of photography and understand how your eyes see with a simple cardboard box. The universe in your hands!
🎯 Clear and Challenging Objectives.
General Objective
Build a functional camera obscura to demonstrate experimentally the principle of rectilinear light propagation and imaging.
Your Personal Mission
Not only will you build an artifact, you'll understand the secret behind every photo you've ever seen! Your challenge is to get a sharp image and explain why it looks upside down, leaving everyone's mouths agape.
🌍 Introduction: A Journey to the Heart of Light
Imagine that light is made up of millions of super-fast beams that always travel in a straight line, like laser arrows. A camera obscura is a totally dark room (or box) with only one small hole, called a pinhole.
- 💡 Light rays from an object (a tree, for example) bounce in all directions.
- ⚫ Some of those beams travel in a straight line to the small hole in your box.
- 🖼️ Because the hole is so small, the rays from the top of the tree can only reach the bottom of the inner wall, and the rays from the base of the tree only reach the top.
- 🤯 The result is a perfect image of the tree, but completely inverted! That's how your eyes and cameras work.
Did you know that...? Renaissance artists like Leonardo da Vinci used giant camera obscuras (entire rooms) to trace landscapes with astonishing accuracy - it was like a 15th century projector!
🔬 Scientific Method: Your Plan of Attack.
- Observation: We see images everywhere, in our eyes, in cameras. How does light form these images?
- Key Question: Can I capture an image of the outside world inside a completely sealed box using only a small hole?
- Hypothesis: If I drill a tiny hole in a dark box, light rays from a bright object will pass through it and project an inverted, colored image on the opposite wall.
- Experimental Design: We will build a camera obscura with homemade materials, controlling the size of the hole and the distance to the screen to observe the changes in the projected image.
- Data Analysis: We will note how sharp, bright and large the image is according to the external light conditions and pinhole size.
- Conclusion: We will validate whether our hypothesis was correct and explain why the camera obscura works, connecting it to the principles of optics.
🧩 This is What Your Creation Looks Like: Anatomy of a Camera Obscura
Your final experiment will be a box (ideally a shoe box) painted black on the inside. At one end, a small perfect hole (pinhole). At the opposite end, a translucent screen (like tracing paper) where the magic happens and the image is projected.
Watch Out Here! Caution Zone: You will be using tools such as scissors, box cutters and pins. Always ask an adult for help, especially when cutting the box and making the hole. Safety is your first successful experiment.
🛠️ Materials: Choose your Inventor Kit
| Material | Economy Option ♻️ | Standard Option ⭐ | Pro Option 🚀 |
|---|---|---|---|
| Camera Body | Shoe box | Sturdy cardboard box | PVC pipe or wooden box |
| Dark Interior | Black cardboard | Matte black acrylic paint | Felt or adhesive black velvet |
| Projection Screen | Vegetable paper (kitchen paper) | Frosted acetate foil | Glass or opaline acrylic |
| Pinhole | Pin or fine needle | Drill bit (0.5mm) | Brass sheet for pinhole |
| Tools | Scissors and tape | Cutter, ruler and glue | Saw, drill and silicone gun |
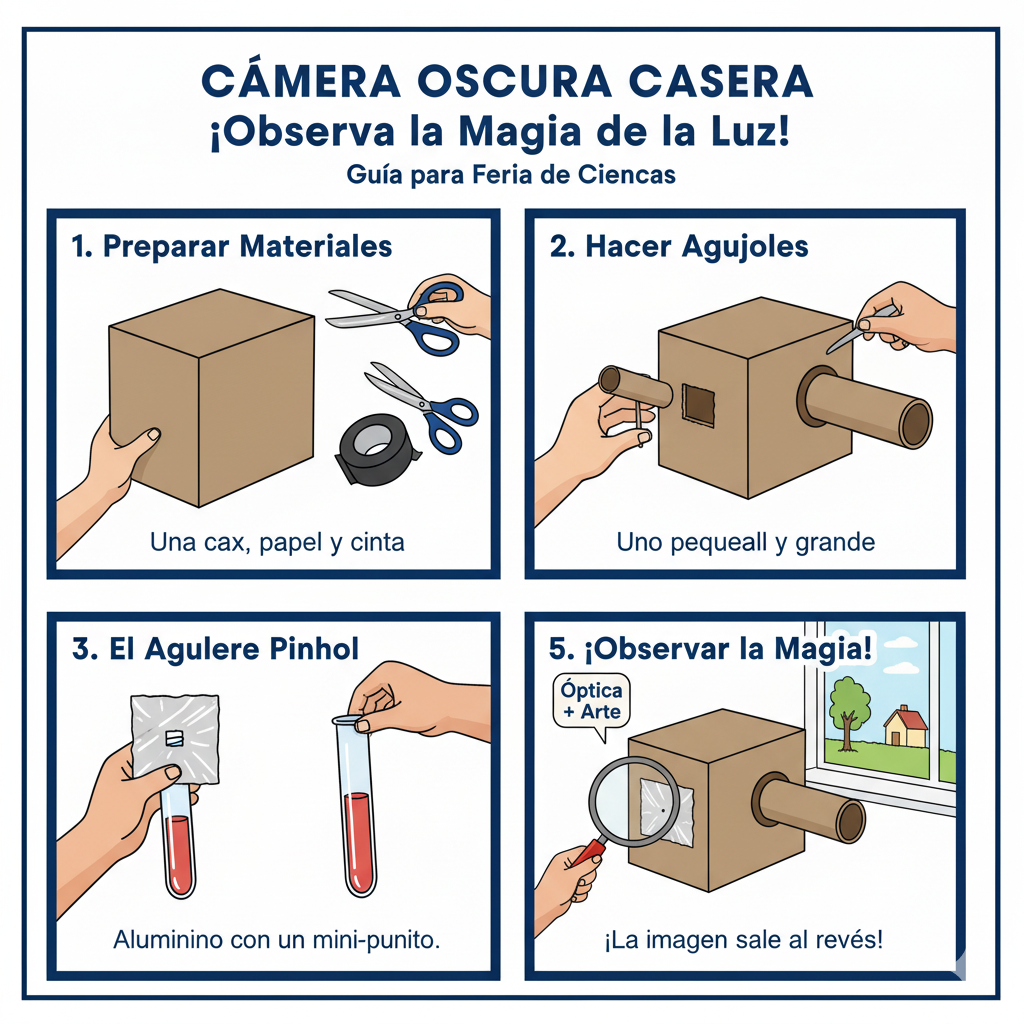
🧭 Step-by-Step Guide: Your Adventure Map
-
Prepare the Box (15 min): Choose a box and paint the entire inside with matte black paint. This is CRUCIAL to avoid reflections that will ruin your image. Let it dry well.Pro Tip: Apply two coats of paint for total darkness.
- Create the Screen (10 min): On one of the short sides of the box, cut out a large window, leaving a frame of about 2 cm. Glue inside your tracing paper or translucent screen tightly.
-
The Perfect Pinhole (15 min): On the side opposite the screen, make a square hole about 3×3 cm. Cut a piece of black cardboard (or soda can) slightly larger (5×5 cm). Very carefully, use a pin to make a tiny, perfectly round hole in the center.Scientist Alert! The size of the pinhole affects the image. A very large one will make it blurry and bright; a very small one, sharp but dark. Experiment!
- Final Assembly (5 min): Glue your piece with the pinhole over the large hole in the box, making sure the pinhole is centered. Seal any possible light entry with black tape.
- To Watch! (∞): On a sunny day, point the pinhole side towards a bright landscape (NEVER look directly at the sun!). Cover your head and screen with a dark blanket to block external light and... behold the inverted image on your screen!
🎪 Let's shine at the Fair! Prepare your booth
Your Scientific Poster
Use this guide as a basis. Your poster should have: Title, Hypothesis, Materials, Procedure (with photos of you constructing it), Results (a photo of the projected image!) and Conclusion. Use graphics and colors from our palette.
Interactive Demonstration
Don't just talk, demonstrate! Have your camera obscura ready. If the light at the fair is too bright, create a «dark theater» with a large box or black cloth so visitors can stick their heads in and watch the magic live. Point the camera at a lamp with an interesting shape.
Phrases to Impress Judges
- «My project demonstrates the principle of rectilinear propagation of light, which is the fundamental basis of all geometrical optics.»
- «Image inversion is not an error, it is a direct consequence of how light rays cross in the pinhole, a phenomenon identical to what occurs in the retina of our eye.»
- «By varying the pinhole size, I found a key balance between image sharpness and brightness, a concept photographers call ‘diffraction vs. blur.’»
📎 Appendices: Your Extra Toolbox
Data Recording Template
Use a table like this one to document your observations in a scientific way.
| Date/Time | Observed Object | Light Conditions | Pinhole Size | Sharpness (1-5) | Brightness (1-5) | Notes |
|---|---|---|---|---|---|---|
| Yard tree | Sunny day | Fine needle | 4 | 2 | Vivid colors, very sharp. | |
| Building across the street | Cloudy day | Fine needle | 3 | 1 | Very dark image, difficult to see. | |
| Same tree | Sunny day | Small nail | 2 | 4 | Much brighter but blurred edges. |
Final Checklist
- ☐ Is the inside of my box 100% black and opaque?
- ☐ Is my pinhole small, round and without jagged edges?
- ☐ Is my projection screen taut and wrinkle-free?
- ☐ Have I sealed all possible light leaks with black tape?
- ☐ Have I tested the camera in different lighting conditions?
- ☐ Do I understand and can I explain why the image looks inverted?
Recommended Sources to Learn More